Add Localization to Askimo App
This guide explains how to add localization support for a new language to Askimo App. By following these steps, you can help make Askimo accessible to users who speak your language.
Overview
Section titled “Overview”Askimo App uses Java’s properties files for localization, with MessageFormat syntax for string interpolation. The localization system automatically discovers and loads available locales based on the properties files present in the resources directory.
Prerequisites
Section titled “Prerequisites”Before you start, make sure you have:
- A working development environment for Askimo (see Development Guide)
- Native or fluent proficiency in the target language
- Basic understanding of:
- Properties file format
- MessageFormat syntax for placeholders
- UTF-8 encoding
Step-by-Step Guide
Section titled “Step-by-Step Guide”Step 1: Create Your Locale File
Section titled “Step 1: Create Your Locale File”Navigate to the localization resources directory:
cd desktop/src/main/resources/i18n/Create a new properties file following the naming convention:
# For language only (e.g., Spanish)messages_es.properties
# For language + region (e.g., Spanish - Mexico)messages_es_MX.properties
# For language + region (e.g., Chinese - Simplified)messages_zh_CN.properties
# For language + region (e.g., Chinese - Traditional)messages_zh_TW.properties
Naming Convention:
- Format:
messages_[language]_[COUNTRY].propertiesormessages_[language].properties - Use ISO 639-1 language codes (lowercase):
en,es,fr,de,ja,zh, etc. - Use ISO 3166-1 country codes (uppercase):
US,GB,MX,CN,TW,JP, etc.
Step 2: Copy the Template
Section titled “Step 2: Copy the Template”Start by copying the English properties file as your template:
cp messages.properties messages_[your_locale].propertiesFor example, to create French localization:
cp messages.properties messages_fr.propertiesStep 3: Translate the Strings
Section titled “Step 3: Translate the Strings”Open your new properties file and translate each string. Here’s what you need to know:
File Header
Section titled “File Header”# Askimo App Application - [Your Language Name] StringsBasic Translation
Section titled “Basic Translation”Most strings are straightforward key-value pairs:
# Englishchat.new=New Chatsettings.title=Settings
# Your translation (example: French)chat.new=Nouveau chatsettings.title=Paramètres
Handling Placeholders
Section titled “Handling Placeholders”Askimo uses MessageFormat syntax with {0}, {1}, {2} for placeholders. These must be preserved in your translation:
# Englishabout.title=About {0}about.copyright=Copyright (c) {0} {1}
# Your translation (example: French)about.title=À propos de {0}about.copyright=Copyright (c) {0} {1}
Important: The placeholders represent dynamic values:
{0}= first argument (e.g., “Askimo” in “About Askimo”){1}= second argument (e.g., “Hai Nguyen” in “Copyright (c) 2025 Hai Nguyen”)- And so on…
You can reorder placeholders if needed for your language’s grammar:
# English (subject-verb-object)validation.min=Value must be at least {0}
# Your translation (example: Japanese - different word order)validation.min={0}以上の値を入力してください
Multi-line Strings
Section titled “Multi-line Strings”Use \n for line breaks:
# Englishchat.provider.model=Provider: {0}\nModel: {1}
# Your translationchat.provider.model=Fournisseur: {0}\nModèle: {1}
Special Characters
Section titled “Special Characters”For special characters and Unicode, use UTF-8 encoding directly:
# Englishsessions.empty.hint=💡 Start a new conversation to create your first session!
# Your translation (example: French)sessions.empty.hint=💡 Démarrez une nouvelle conversation pour créer votre première session!
Step 4: Translation Guidelines
Section titled “Step 4: Translation Guidelines”Follow these best practices for high-quality translations:
Consistency
Section titled “Consistency”- Use consistent terminology throughout
- Keep the same level of formality across all strings
- Maintain consistent capitalization rules for your language
Context Awareness
Section titled “Context Awareness”- Consider where the text appears (button, title, tooltip, error message)
- Match the tone and style of each context:
- Buttons: Action-oriented, concise
- Titles: Clear and descriptive
- Tooltips: Brief but helpful
- Error messages: Clear and actionable
Key Categories to Translate
Section titled “Key Categories to Translate”- Application (app.*)
- Application name, title, description
- Menu Items (menu.*)
- File, Edit, View, Help menus
- Chat Interface (chat.*)
- Input placeholders, buttons, status messages
- Sessions (session.*)
- Session management, export, rename functions
- Settings (settings.*)
- Configuration options, preferences
- Theme (theme.*)
- Light, dark, system theme descriptions
- Models & Providers (model., provider.)
- AI provider names and configuration
- Errors & Validation (error., validation.)
- Error messages, validation feedback
- Actions (action.*)
- Common actions (copy, paste, save, cancel, etc.)
- About Dialog (about.*)
- Version info, copyright, license
- Directives (directive.*)
- Directive management interface
- Language Instructions (language.*)
- AI communication language directives
Example: Complete Translation Section
Section titled “Example: Complete Translation Section”# Sessions - English Originalsession.new=New Sessionsession.rename=Rename Sessionsession.delete=Delete Sessionsession.star=Starsession.unstar=Unstarsession.starred=Starredsession.all=All Sessionssession.delete.confirm=Are you sure you want to delete this session?session.export=Exportsession.export.tooltip=Export entire chat history
# Sessions - French Translationsession.new=Nouvelle sessionsession.rename=Renommer la sessionsession.delete=Supprimer la sessionsession.star=Ajouter aux favorissession.unstar=Retirer des favorissession.starred=Favorissession.all=Toutes les sessionssession.delete.confirm=Êtes-vous sûr de vouloir supprimer cette session ?session.export=Exportersession.export.tooltip=Exporter l'historique complet du chatStep 5: Handle Language-Specific Directives
Section titled “Step 5: Handle Language-Specific Directives”The application includes special directives that tell the AI how to communicate with users. Translate these carefully:
# Language Directive Templateslanguage.directive.instruction=LANGUAGE INSTRUCTION: You must communicate with the user in %s. Read user messages in %s and respond in %s. Use natural, conversational %s appropriate for the context.
language.directive.fallback=FALLBACK: If you do not support %s or cannot generate proper %s text, respond in English and inform the user that %s is not fully supported.
language.name.display=English
Important:
- The
%splaceholders in these strings useString.formatsyntax (not MessageFormat) - These are template strings used by the code, keep
%sas-is - Only translate
language.name.displayto your language name - In the actual properties file, use
\nfor line breaks, but here we show them expanded for readability
Example for French:
language.directive.instruction=INSTRUCTION LINGUISTIQUE: Vous devez communiquer avec l'utilisateur en %s. Lisez les messages de l'utilisateur en %s et répondez en %s. Utilisez un %s naturel et conversationnel adapté au contexte.
language.directive.fallback=SOLUTION DE REPLI: Si vous ne prenez pas en charge le %s ou ne pouvez pas générer un texte %s correct, répondez en anglais et informez l'utilisateur que le %s n'est pas entièrement pris en charge.
language.name.display=Français
Step 6: Verify Your Translation
Section titled “Step 6: Verify Your Translation”Check for Common Issues
Section titled “Check for Common Issues”- Missing placeholders: Ensure all
{0},{1}, etc. are preserved - Encoding issues: Save the file as UTF-8
- Syntax errors: No unescaped special characters
- Completeness: All keys from English file are present
Validation Commands
Section titled “Validation Commands”You can use these shell commands to verify your translation is complete. These commands use Unix utilities (comm, grep, cut, sort) that are available on macOS and Linux.
Check for missing keys (keys in English but not in your translation):
comm -23 <(grep "^[a-z]" messages.properties | cut -d= -f1 | sort) \ <(grep "^[a-z]" messages_[your_locale].properties | cut -d= -f1 | sort)Check for extra keys (typos in key names in your translation):
comm -13 <(grep "^[a-z]" messages.properties | cut -d= -f1 | sort) \ <(grep "^[a-z]" messages_[your_locale].properties | cut -d= -f1 | sort)If these commands return any output, you have missing or extra keys that need to be fixed.
What these commands do:
- Extract all property keys from both files
- Sort them alphabetically
- Compare the two lists to find differences
Alternative: Manual Verification
If you’re on Windows or prefer a simpler approach:
-
Open both
messages.propertiesand your translation file -
Count the lines in both files (should be similar)
-
Search for each key prefix in your translation:
- Search for
app.- should find all application strings - Search for
chat.- should find all chat strings - Search for
settings.- should find all settings strings - And so on for each category
- Search for
-
Use your IDE’s “Find in Files” feature to search for any untranslated English text
Step 7: Test Your Locale
Section titled “Step 7: Test Your Locale”Build the Application
Section titled “Build the Application”./gradlew :desktop:buildRun the Application
Section titled “Run the Application”./gradlew :desktop:runTest the Locale
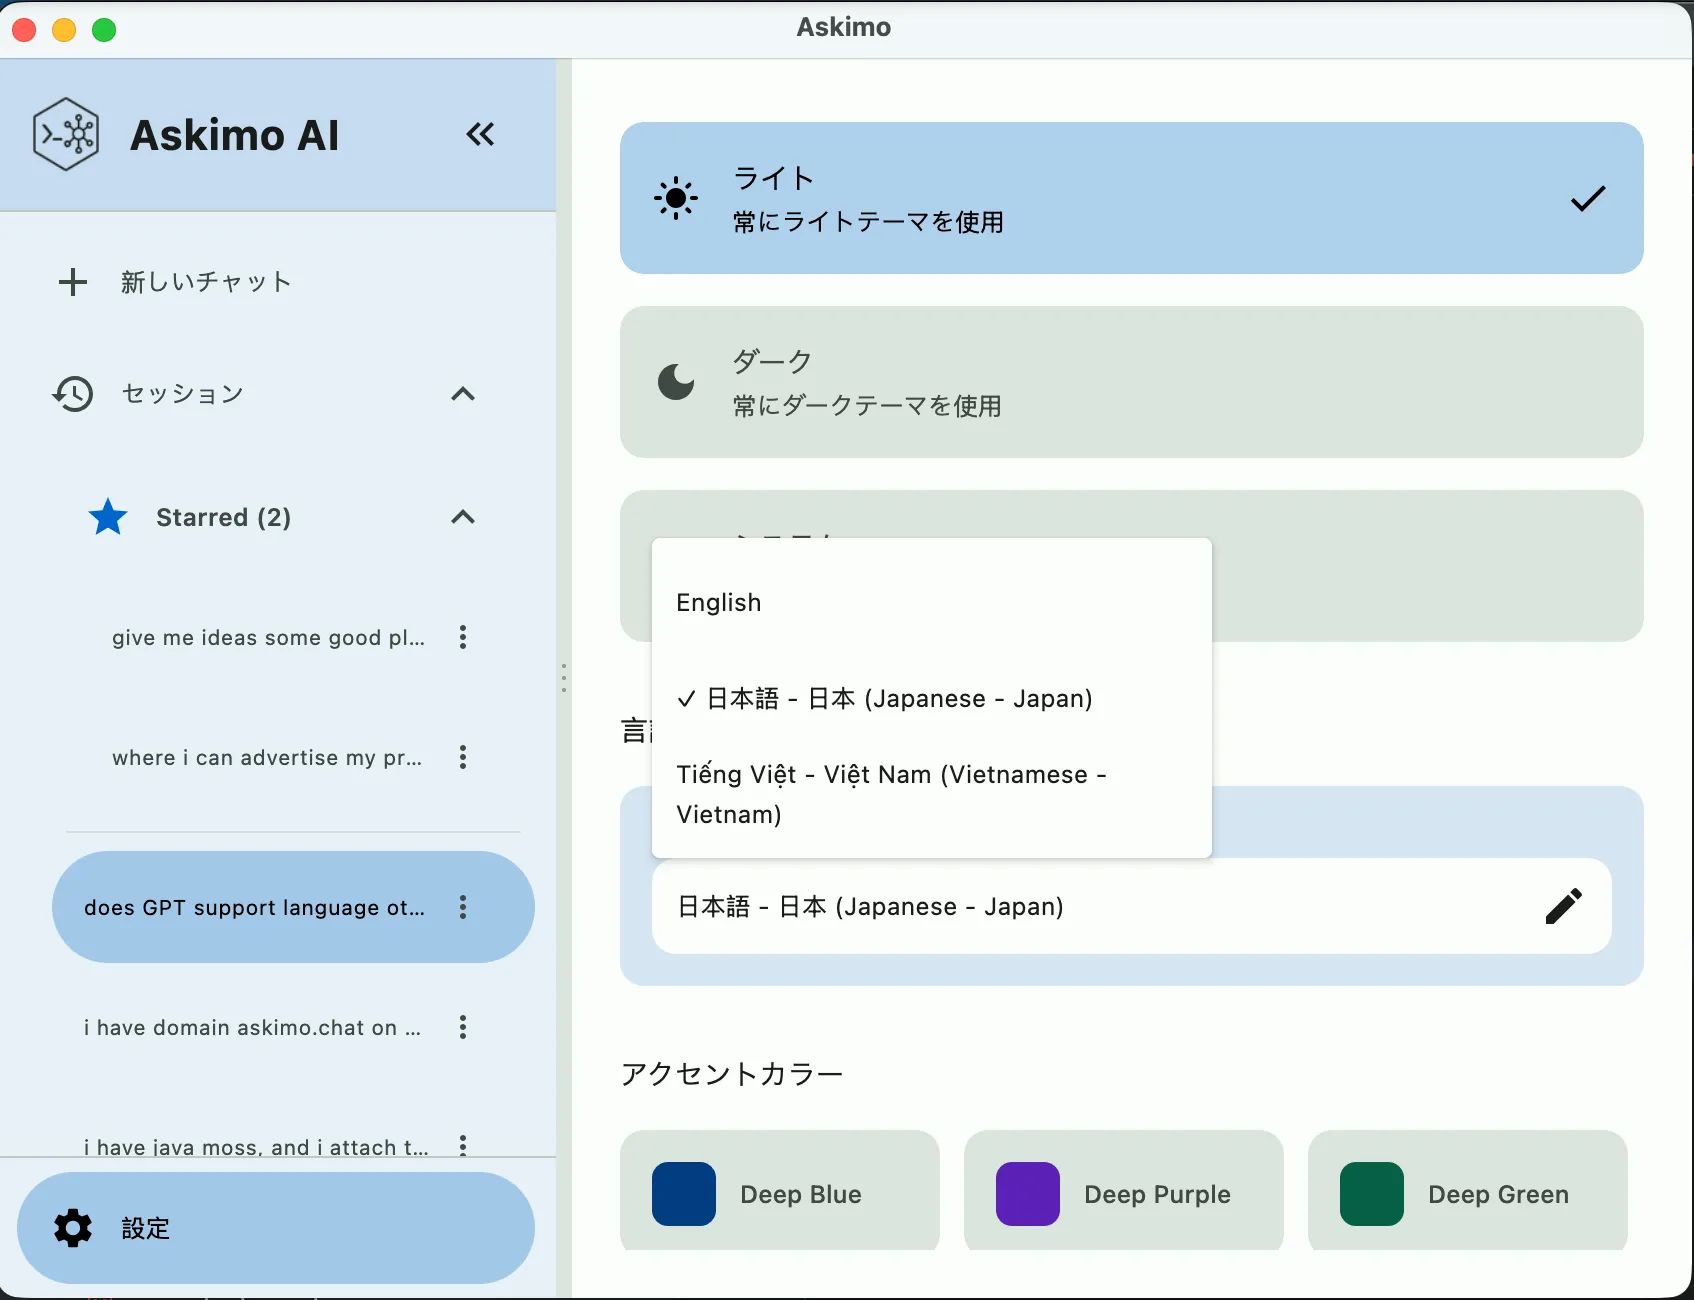
Section titled “Test the Locale”- Open the application
- Go to Settings (⚙️)
- Find Application Language dropdown
- Select your new locale
- Navigate through all screens and verify:
- All text displays correctly
- No missing translations (showing keys instead)
- Placeholders are properly replaced with values
- Text fits in UI elements (not truncated)
- Special characters render correctly
Step 8: Submit Your Contribution
Section titled “Step 8: Submit Your Contribution”Once you’ve completed and tested your translation:
- Commit your changes:
git add desktop/src/main/resources/i18n/messages_[your_locale].propertiesgit commit -m "Add [Language Name] localization"- Create a pull request:
- Fork the repository
- Push your changes to your fork
- Open a pull request with:
- Clear title: “Add [Language] localization”
- Description of what you translated
- Any notes about language-specific choices you made
- Include in your PR description:
- Native language name (e.g., “Français” for French)
- Your language proficiency level
- Any areas where you’d like review
- Screenshots showing the translation in the app (optional but helpful)
Advanced Topics
Section titled “Advanced Topics”Handling Regional Variants
Section titled “Handling Regional Variants”If your language has significant regional differences, create separate files:
# Spanish (generic)messages_es.properties
# Spanish (Mexico)messages_es_MX.properties
# Spanish (Spain)messages_es_ES.properties
The application will:
- Try to load the specific regional variant (e.g.,
es_MX) - Fall back to the language-only variant (e.g.,
es) - Fall back to English if neither exists
MessageFormat Syntax Reference
Section titled “MessageFormat Syntax Reference”Common MessageFormat patterns you’ll encounter:
# Simple substitutiontext=Hello {0}!# Usage: "Hello World!"
# Multiple argumentstext=Welcome {0}, you have {1} messages.# Usage: "Welcome John, you have 5 messages."
# Reordering (for different grammar)text.en=Show {0} results for {1}text.ja={1}の検索結果を{0}件表示# Both valid, different word order
Right-to-Left Languages
Section titled “Right-to-Left Languages”For RTL languages (Arabic, Hebrew, etc.), the properties file remains the same format. The UI layout will be handled by the application’s RTL support (if implemented).
Special Characters to Escape
Section titled “Special Characters to Escape”In properties files, these characters may need special handling:
#at line start → comment (use\#if needed in text)!at line start → comment (use\!if needed in text)=in values → no escaping needed:in values → no escaping needed- Backslash
\→ use\\for literal backslash - Newline → use
\n - Tab → use
\t
Locale Discovery
Section titled “Locale Discovery”The application automatically discovers available locales by:
- Scanning for
messages_*.propertiesfiles ini18n/directory - Parsing the locale code from the filename
- Building the display name using
Locale.getDisplayLanguage() - Adding the locale to the Settings dropdown
No code changes required - just add your properties file and rebuild!
Display Name Format
Section titled “Display Name Format”Locales appear in the Settings dropdown with this format:
Native Name (English Name)Examples:
- English
- 日本語 (Japanese)
- Tiếng Việt (Vietnamese)
- Français (French)
- Español (Spanish)
For regional variants:
Native Name - Native Region (English Name - English Region)Examples:
- 中文 - 中国 (Chinese - China)
- 中文 - 台灣 (Chinese - Taiwan)
- Español - México (Spanish - Mexico)
Maintenance
Section titled “Maintenance”After your locale is added:
- Monitor Updates: Watch for new strings added to
messages.properties - Update Your Translation: Add translations for new keys as they’re added
- Community Review: Help review updates to your locale from other contributors
- Report Issues: If you notice translation errors, open an issue or PR to fix them
Getting Help
Section titled “Getting Help”If you need assistance:
- Look at existing translations:
messages_ja_JP.propertiesandmessages_vi_VN.propertiesare complete examples - Check the source code: See how strings are used in context
- Ask questions: Open a GitHub issue with the
localizationlabel - Join discussions: Participate in localization discussions in the community
Resources
Section titled “Resources”- Java Properties File Format
- MessageFormat Documentation
- ISO 639-1 Language Codes
- ISO 3166-1 Country Codes
Thank You!
Section titled “Thank You!”Your contribution helps make Askimo accessible to users around the world. Thank you for taking the time to translate and localize the application! 🌍 ❤️